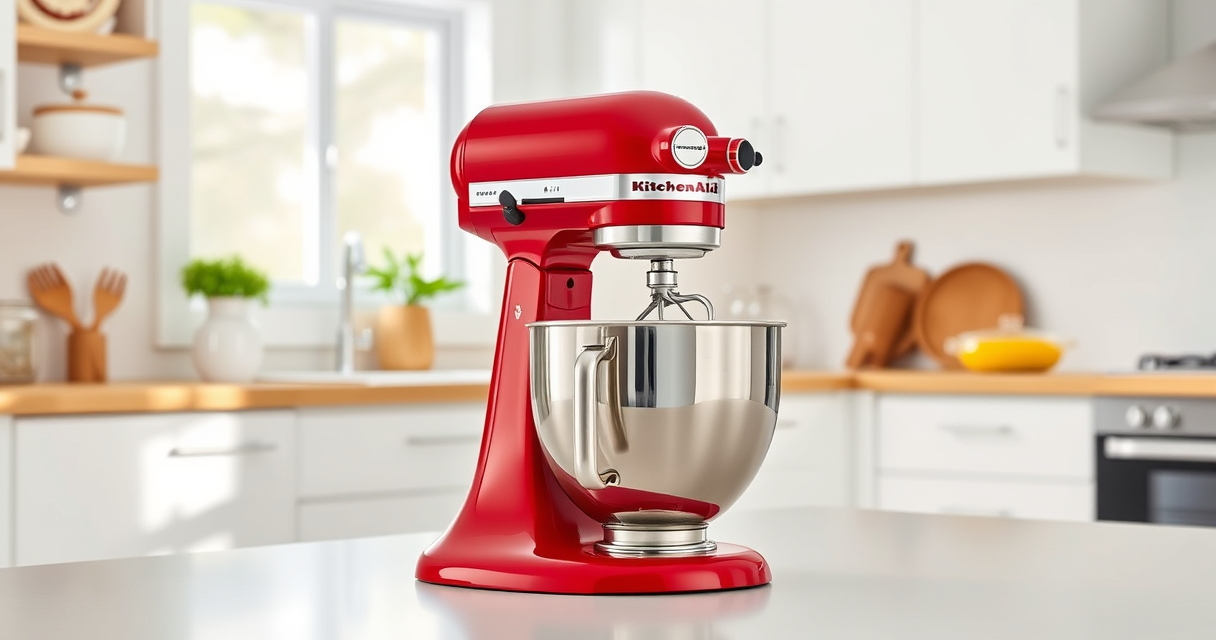
Getting your new KitchenAid Artisan Series 5 Quart Tilt Head Stand Mixer ready for use is straightforward, but proper setup ensures safety and the best mixing results. Whether you’re a first-time user or upgrading your kitchen, this guide will walk you through the essential steps to assemble, attach accessories, and troubleshoot common issues.
Before you begin, gather your mixer, accessories, and ensure your workspace is clean and dry. Follow these detailed steps for a smooth setup process and enjoy your new mixer for years to come.
Key Takeaways
| Ease of Setup | Simple, step-by-step assembly ensures quick setup. |
| Safety First | Proper attachment and electrical safety are emphasized. |
| Optimal Performance | Correct accessory attachment guarantees best results. |
| Troubleshooting Tips | Common issues are addressed for quick fixes. |

KitchenAid Artisan, 5-Qt Tilt Head Stand Mixer, KSM150PS, Milkshake
- Durable Metal Construction: Built to last with 59 touchpoints
- 5-Quart Stainless Steel Bowl: Handles small or large batches, dishwasher safe
- Tilt-Head Design: Easy ingredient addition and access to bowl
As an affiliate, we earn on qualifying purchases.
Unboxing and Initial Inspection
- Carefully unpack your KitchenAid Artisan Mixer and accessories. Check that all components, including the tilt-head, bowl, pouring shield, and any attachments, are present.
- Inspect for any damage during transit. If anything looks damaged or missing, contact the seller before proceeding.
- Place the mixer on a stable, flat surface near an electrical outlet. Ensure your workspace is clean and free of clutter.

KitchenAid KSMMGA Food Grinder Attachment for All KitchenAid Stand Mixers
- Compatible with KitchenAid Mixers: Connects to all KitchenAid stand mixers
- Versatile grinding plates: Includes fine, medium, and coarse plates
- Sausage stuffer tubes: Comes with two sausage stuffer tubes
As an affiliate, we earn on qualifying purchases.
Assembling the Mixer
- Lift the tilt-head lever located on the side of the mixer to unlock the head. Gently tilt the head back until it locks into the upright position.
- Insert the stainless steel bowl onto the bowl lift hub, aligning the notches. Turn the bowl clockwise to lock it securely in place.
- Attach your preferred beater (flat beater, whisk, or dough hook) onto the hub, ensuring it clicks into place firmly.
Attaching Accessories
If you plan to use additional attachments like the pasta roller or food grinder, ensure your mixer is unplugged before attaching. Connect the chosen attachment to the power hub on the front of the mixer. Turn the attachment clockwise until it locks securely. Refer to the specific attachment instructions for proper setup.
Powering On and Basic Operation
- Plug in your mixer, ensuring the cord is not strained or in the way.
- Set the speed dial to ‘Off’ before turning on. Turn the dial to your desired speed, starting low and increasing gradually.
- Monitor the mixer during initial operation to ensure everything runs smoothly. Use the pour shield to prevent splashes.
Troubleshooting Common Issues
- Mixer not turning on: Check if the mixer is properly plugged in and the power outlet is functional. Ensure the tilt-head is securely locked in position.
- Attachment not rotating: Confirm the attachment is properly connected to the power hub. Check for obstructions or misalignment.
- Unusual noise or vibration: Verify that the bowl and attachment are securely attached. Avoid overloading the mixer with very thick dough or large batches.
The Products in This Guide

KitchenAid Artisan Series 5 Quart Tilt Head Stand Mixer
- ✔ Dimensions: 14 x 8 x 14 inches
- ✔ Weight: 26 lbs
- ✔ Warranty: 1 Year

KitchenAid Stand Mixer Attachment
- ✔ Weight: 2 lbs
- ✔ Dimensions: 12 x 3 x 3 inches
- ✔ Warranty: N/A
KitchenAid Artisan Series 5 Quart Tilt Head Stand Mixer
The KitchenAid Artisan Series 5 Quart Tilt Head Stand Mixer is built with durable metal construction and offers 10 speeds for almost any task. Its tilt-head design provides easy access to the bowl, making it simple to attach accessories or add ingredients. Perfect for small or large batches, it’s a reliable choice for everyday baking and cooking.
Pros:
- Robust metal build for longevity
- Tilt-head for easy access
- Multiple color options
- Powerful motor with 10 speeds
Cons:
- Limited to 5-quart capacity
- Attachments sold separately
- Can be heavy to move occasionally
Best for: Home bakers looking for a versatile and reliable stand mixer
Not ideal for: Large commercial kitchens or those needing bigger capacity
Bottom line: A dependable, stylish mixer perfect for everyday baking needs.
KitchenAid Stand Mixer Attachment
The KitchenAid Stand Mixer Attachment with 3-Piece Pasta Roller & Cutter Set transforms your mixer into a pasta-making station. It’s perfect for creating fresh, homemade pasta with consistent thickness and professional-looking cuts. Easy to use and clean, it’s a must-have for pasta enthusiasts.
Pros:
- Stainless steel rollers and cutters
- Multiple thickness settings
- Easy to clean
- Includes pasta sheets and cutters
Cons:
- Additional cost
- Requires attachment hub
- Limited to pasta-making
Best for: Home cooks wanting fresh pasta at home
Not ideal for: Dishwasher-safe cleaning only; avoid dishwasher for the attachment
Bottom line: Ideal for pasta lovers wanting fresh, homemade noodles.
Frequently Asked Questions
How do I clean the KitchenAid stand mixer after use?
Unplug the mixer and detach any accessories. Wipe the body with a damp cloth. Wash the bowl and attachments with warm, soapy water or place dishwasher-safe parts in the dishwasher.
Can I use other attachments with my KitchenAid mixer?
Yes, the mixer has a power hub that supports various attachments like pasta rollers, food grinders, and more, sold separately.
What should I do if the mixer isn’t turning on?
Check that the mixer is plugged in properly, the outlet is working, and the tilt-head is securely locked in place. Reset the switch if necessary.
How do I troubleshoot if the mixer is making unusual noises?
Ensure all attachments are correctly installed and not obstructed. Avoid overloading with heavy dough or large batches. Contact customer service if noise persists.
Is the pouring shield necessary?
While optional, the pouring shield helps prevent splatters and makes adding ingredients easier during mixing.
Start Your Baking Journey with Confidence
Setting up your KitchenAid Artisan stand mixer is quick and straightforward with these steps. Proper assembly and attachment ensure safety and optimal performance. With your mixer ready, you can confidently explore a range of recipes, from cookies to homemade pasta, knowing you have a reliable kitchen companion. Remember to follow safety tips and troubleshooting advice for a smooth experience every time.
Affiliate disclosure: As an Amazon Associate we earn from qualifying purchases. Prices and availability are accurate as of the time of publishing.